
How to Fix a Leaky Outdoor Spigot
- Simple DIY Steps
- Parts available at local hardware stores
- Fix it yourself and prevent damage to your home
A dripping outdoor spigot may seem like a minor annoyance, but it can lead to major problems if ignored. Not only does it waste water and increase your utility bill, but it also creates damp soil around your home’s foundation, which can contribute to structural issues over time.
Avoiding Water Damage
If left unchecked, the constant moisture can cause:
- Mold and mildew growth near your home’s exterior.
- Soil expansion under the foundation, potentially shifting pipes.
- Pipe cracks or slab leaks if a pressurized pipe pushes against the foundation.
FYI, these terms are often used interchangeably. They mean the same thing: spigot, hose bibb, outdoor faucet, tap.
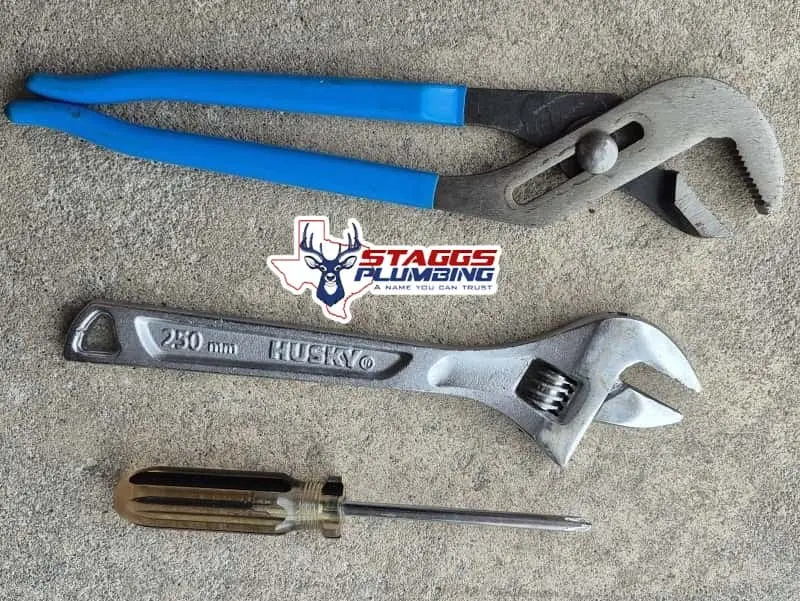
Tools Needed
- Adjustable Wrench. Used for tightening or loosening the packing nut.
- Channel Lock Pliers. These hold the spigot body steady while you work.
- Screwdriver (Flathead or Phillips). You’ll need this to remove the washer screw.
- Water Meter Key. Lets you lift the meter lid and turn the shutoff valve.
Helpful Extras (Not Always Necessary but Useful)
- Valve Seat Dresser Tool. If the faucet seat is corroded, this tool smooths it out.
If the Spigot is Stuck or Rusted
- Pipe Wrench. For stubborn spigots, this gives you extra grip if the packing nut won’t budge.
- Penetrating Oil like WD-40 or PB Blaster. Helps loosen corroded nuts.
Repair Options
| Option | When to Use | Estimated Cost | Time & DIY Difficulty |
|---|---|---|---|
| Tighten Packing Nut | Leak around valve stem (handle area) | $0 | 5 min, Very Easy |
| Replace Washer | Drips when turned off; handle turns easily | $1 – $5 | 10 to 20 min, Easy |
| Replace Valve Stem | Washer fix failed or stem is worn | $20 – $30 | 15 to 30 min, Moderate |
| Full Spigot Replacement | Recurring leaks, visible rust, base leaks, or frost-free upgrade | $30 – $70 | 30 to 60 min, Moderate to Hard |
| Hire a Plumber | Pipes are corroded, damaged, or difficult to access | $125 to $300+ | 1 to 2 hrs, Not DIY |
Outdoor Spigot Repair Options: Quick Fix or Full Replacement?
A dripping spigot can often be fixed with a simple washer or stem replacement – cheap and DIY-friendly. But if leaks persist, corrosion is visible, or the faucet is old and stiff, replacing the entire unit may be the smarter long-term solution. Here’s how to decide which repair approach fits your situation.
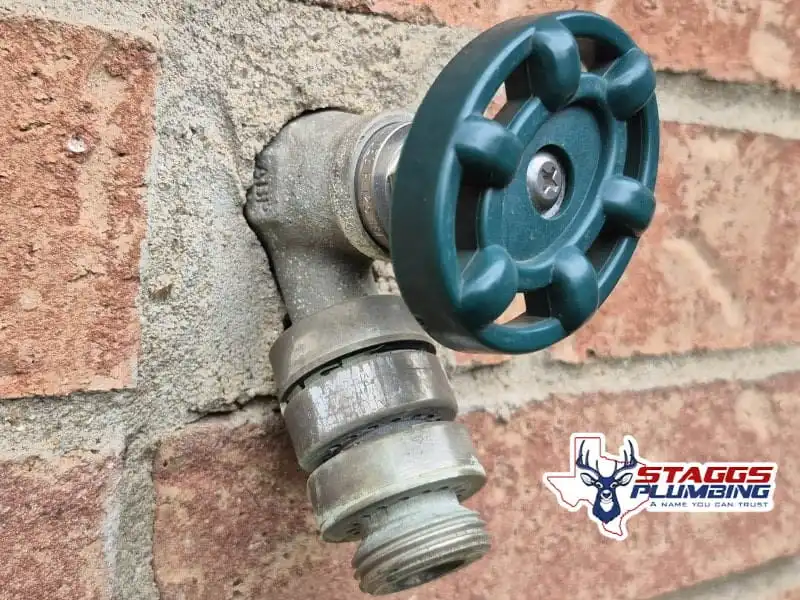
Tighten the Packing Nut
Before replacing any parts, try this zero-cost solution:
- Symptom: Leak around the valve stem (where the handle meets the spigot).
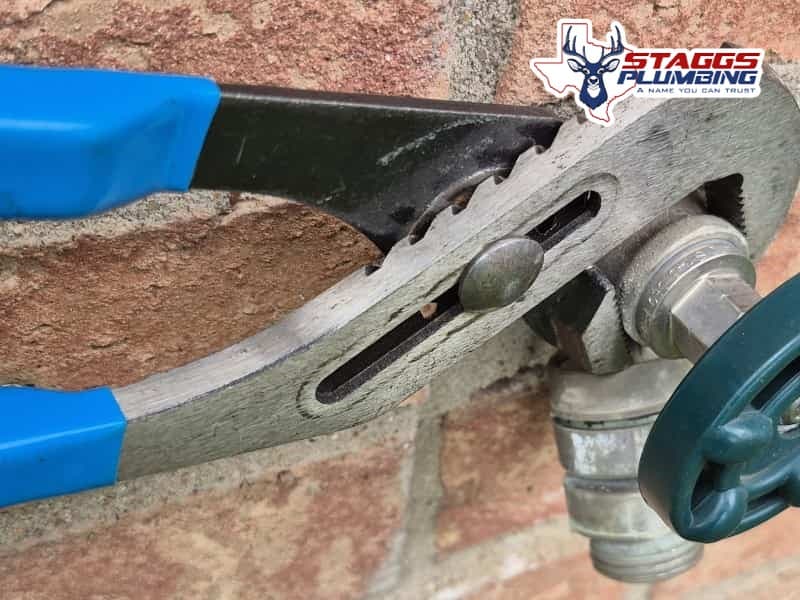
- Fix: Use an adjustable wrench to gently tighten the packing nut (just behind the handle) 1/8 to 1/4 turn clockwise. Hold the spigot body steady with channel locks to avoid twisting pipes.
- Why it works: Over time, the nut loosens, letting water seep past the stem. Snugging it restores the seal.
- If it fails: Still leaking? Then move on to washer or stem replacement.
Pro tip: Don’t overtighten. You could crack the nut or damage the stem!

When to Just Replace the Washer
A worn-out rubber washer is the most common cause of a dripping spigot, and it’s also the easiest and cheapest fix. Go with a washer replacement if:
- The leak only happens when the spigot is turned off (drips from the spout).
- The handle turns smoothly (no stiffness or grinding).
- The spigot body looks intact (no cracks or heavy rust).
- You want a quick, under $10 fix (takes 15 minutes with basic tools).
This simple repair works best on newer or well-maintained spigots. If tightening the packing nut doesn’t stop the leak, swapping the washer usually does the trick.
When to Replace the Entire Outdoor Spigot (Stem + Washer + Sillcock Body)
While replacing just the washer or stem can fix minor leaks, there are times when a full spigot replacement is the better long-term solution. Here’s when you should consider swapping out the entire unit:
1. Frequent Leaks After Repairs
- If you’ve replaced the washer or stem multiple times and the spigot still drips, the internal seat (where the washer seals) may be worn or corroded.
- A new spigot ensures a fresh sealing surface.
2. Visible Corrosion or Cracks
- If the body of the spigot is rusted, cracked, or damaged, temporary fixes won’t last.
- Corrosion inside the valve can cause slow leaks even with new washers.
3. Upgrading to Frost-Free or Anti-Siphon
- Older spigots may lack frost protection (leading to burst pipes in winter) or backflow prevention (required by code in many areas).
- Replacing the whole unit ensures compliance and better durability.
4. Difficulty Turning the Handle
- If the stem is stiff even after lubrication, internal threads may be worn or calcified.
- A new spigot will operate smoothly.
5. Leaks from the Spigot’s Base (Where It Meets the Wall)
- If water drips from the connection point, the pipe threads or internal seals may be failing.
- A full replacement prevents hidden water damage inside the wall.
How To Fix A Dripping Water Spigot: Step by Step Instructions
Sometimes, the spigot just needs to be tightened up to properly seal from water leaks.
If the spigot is leaking around the valve stem when the water is turned on, it can usually be fixed by tightening the packing nut behind the handle 1/8 to 1/4 turn.
If the faucet still leaks after tightening the packing nut, the washer on the end of the valve stem needs to be replaced. Here’s how to go about it:
- Turn the water off at the water meter using a cut-off key.
- Open the water meter cover.
- You may need a meter key to open the meter cover.
- The water meter is usually located close to the road. The lid is made of metal.
- With your cut off key, slowly turn the valve clockwise to shut off the water supply. It should turn about 180 degrees.
- Back at the wall of your home, open the spigot by turning the handle anti-clockwise to release any air or water pressure.
- Unscrew the packing nut beneath the handle of the spigot. Use a pair of channel locks to hold the body of the spigot still while using an adjustable wrench to loosen up the packing nut.
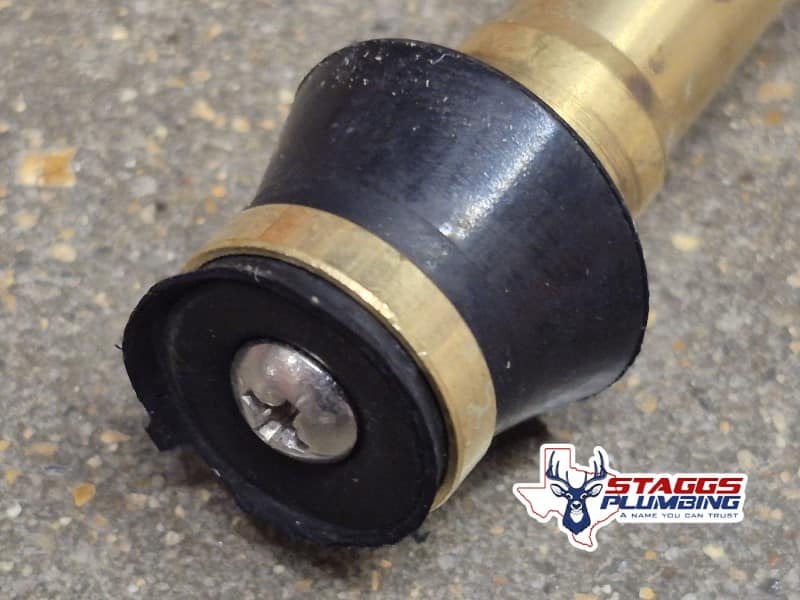
- Once loosened, hold the faucet handle, and pull the valve stem out of the spigot. The valve stem will look similar to the one in the picture (it may be shorter)
- Remove the screw on the valve stem holding the faucet washer.
- Replace the washer with one of the same size. (obviously, the new one will be thicker)
- Push the valve stem back into the spigot housing.
- Tighten the packing nut on the spigot with an adjustable wrench until snug.
- Turn the faucet handle clockwise to close it off.
- Use the cut-off key to turn the water back on at the meter. Turn it slowly about 180 degrees anti-clockwise to turn the water supply back on.
- Turn the spigot back on to remove any air from the line and let it run for several seconds.
- Check for leaks around the packing nut on the valve stem.
- Turn it back off and check for any leaks. Note, you may see drips for several seconds once the water has been turned off. This is normal. The remaining water in the spigot chamber is just draining out.
How To Replace A Water Spigot: Instructional Video
This video from the Dallas water utilities conservation department shows you step by step instructions for replacing the washer on the spigot stem. A slow drip from a faucet is usually caused by a worn out washer like the one shown above.